Showing posts with label Windows. Show all posts

Monday, March 11, 2019

How to disable annoying Windows 10 notification sounds!

Written by Pranshu Bajpai | Twitter | LinkedIn

There are some Windows 10 notification (system) sounds that are quite annoying to say the least. I am not sure who decided that it was a good idea to choose these sounds for alert notifications in Windows 10. One in particular was quite annoying to me and I wanted to get rid of it. Here's how you can get rid of a specific Windows 10 notification sounds.


Locate the source


You have to first figure what sound(s) do you dislike the most and where they are originating from. For this, you can access 'change system sounds' in the Windows search bar. That brings up the 'sounds control panel'.


Over here, play the different sounds ('Test') and locate the source of the sound that you want to turn off. In my case, it was the Asterisk sound that originated from 'Windows Background.wav'. I tried to select 'None' for asterisk and apply the setting but the sounds would still play for other events. I wanted to completely get rid of that sound 'Windows Background.wav'. Therefore, I decided to just delete the source of the sounds -- the WAV file itself.

Delete the source


The WAV file is located in C:/Windows/media/. However, Windows would not let me simply delete the file since it is owned by 'TrustedInstaller'.


Alright, seems like I need to first take ownership of the file before I delete it. Right click on the WAV file and click 'Properties'. From here, access the 'Security' tab and then 'Advanced'. This will bring up a Window that tells us that the owner of the file currently is "TrustedInstaller". We need to modify this so click 'Change'. Type your username in the 'object name' area and hit 'Check Names'. It should populate the correct username. If it doesn't, go to advanced and hit 'Find Now' and select the correct name.


It should display a message saying something along the lines of "you have taken ownership of the file". You should now be able to delete the file.

Good riddance "Windows Background.wav". You will not be missed.

Thursday, January 17, 2019

KringleCon | Yule Log Analysis | CTF Challenge Solution

Written by Pranshu Bajpai | TwitterLinkedIn

Pepper Minstix: Yule Log Analysis


As part of this challenge, we are looking at Microsoft Event Viewer Logs to discover an instance of password spraying that eventually succeeded. Password spraying is when attackers use different usernames in rotation to attempt login. This is done to prevent account lockout during password guessing or brute forcing. For example, if an attacker provides incorrect password more than 3 times within a certain time period for the same account, they would be locked out. However, if they tried the same password for different usernames, they would buy themselves more time before hitting the same username again with a different password. This has the potential to prevent account lockout which allows the attackers to keep going.

We are to look for evidence of password spraying in the logs and zero in on an instance when the attackers were able to successfully login as a user. The solution to the challenge will then be the user that the attackers logged in as. We are provided with a python log parser that is able to read the logs and provide us with intelligible logs. As expected, there is a lot of events in the logs which would take us a long time to manually go through. So we need to write regex or grep queries to quickly locate events of interest. Let's take a look at the logs:

evtx_dump.py ho-ho-no.evtx | more


It's a markup format with each event enclosed with the <Event> tags and identified with EventID. To understand the EventIDs, we refer to this resource online. Basically, we need to understand what these event IDs imply. Looking at the resource, we are able to determine that EventID 4624 refers to a successful login where as 4625 means that an account failed to logon.

ID
Message
4624
An account was successfully logged on.
4625
An account failed to log on.


A password spraying attack would involve a series of 4625 events with different usernames. In this case, we are investigating a successful login by the adversary so we know that it will be a series of 4625 event, followed by a 4624 event (successful login). Then to solve this challenge, we have to extract the username from that 4624 event. So let us begin analyzing the logs with this information in mind.

First, let's look for a lot of 4625 events to identify our adversary:

evtx_dump.py ho-ho-no.evtx | grep "4625" -A 20 -B 20


Looks like a majority of the 4625 events are initiated by the remote IP address: 172.31.254.101. So I'm thinking that is our threat actor. Note that their SID is S-1-5-18. Now using this information, we zero in on their activities -- particularly, we try to figure out where they got a 4624 event (meaning they successfully logged in).

evtx_dump.py ho-ho-no.evtx | grep 'ess">172.31' -A 10 -B 35 | grep "S-1-5-18" -A 22 -B 16 | grep "4624" -A 35 -B 1


This record clearly shows that the threat actor 172.31.254.101 logged in successfully (4624) with the username minty.candycane.


Answer: minty.candycane

Friday, December 21, 2018

Repair Bootcamp partition boot entry missing after disk resize

Written by Pranshu Bajpai | LinkedIn

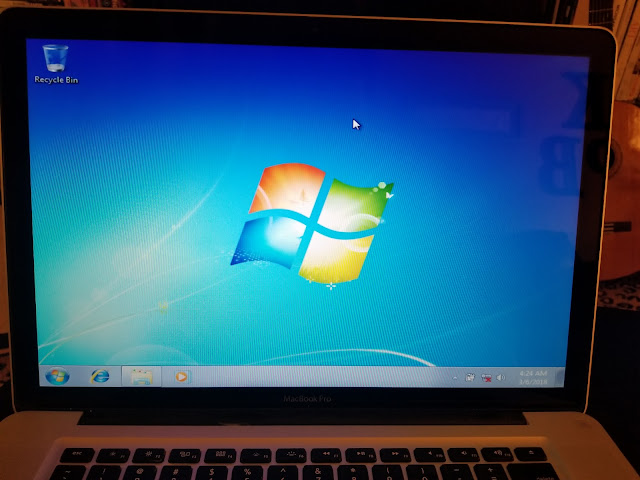
I recently installed the latest copy of Mac OS X and lost the Bootcamp Windows partition boot entry from the MBR (Master Boot Record). It took a series of steps to get the Bootcamp partition boot entry back into the MBR and so I decided to document the procedure. On an unrelated note, this write up also involved resetting the Windows 7 password since I realized that I forgot the Windows password.

The problem is that when the disk structure is modified, the Bootcamp boot entry is lost from the MBR. However, the partition still exists and the files within the Bootcamp partition are untouched. This can be verified by logging into the alternate OS (Mac OS X) and using Disk Utility to look at the partition structure. The Bootcamp partition should still be there. If it is, the file explorer can be used to verify that the files within the Bootcamp partition all still exist. We can now begin restoration of the Bootcamp boot entry.

Step 1. Obtain gptfdisk


Head over to sourceforge and obtain the latest copy of gptfdisk: https://sourceforge.net/projects/gptfdisk/

We will use this tool to derive some disk information. After installing this tool, bring up a Terminal window and execute:
sudo gpt -r -vv show disk0
sudo fdisk /dev/disk0
diskutil list


Locate the Bootcamp partition and notice the partition number assigned to it. In my case, it was 5. You can also verify this in Disk Utility where clicking info about the Bootcamp partition should show something like disk0s5,also note that the bootable flag is likely set to no at this time.


Now that we are equipped with the knowledge of what the disk number is for the Bootcamp partition, we can begin the procedure of restoring the Bootcamp entry in MBR.

Step 2. Restore Bootcamp entry in the MBR


Use the gdisk tool as follows to restore the partition entry:

sudo gdisk /dev/disk0
r
h
5
Place EFI GPT (0xEE) partition first in MBR (good for GRUB)? y
accept default code of 07
set bootable flag? y
do not protect more partitions? n
o
w
proceed? y
Exit the terminal at this point and restart Mac. Press and hold the ALT key at boot time and the Bootcamp boot entry should now appear in the MBR. We have fixed the problem.


Addendum


I forgot the Windows 7 password since I hadn't logged into for a while (I don't really use this Windows partition for another but to play some games and I couldn't even do that with the Bootcamp boot entry missing). So now I had to find a way to reset Windows 7 password. Turns out the old renaming sethc, copying command prompt executable and renaming it sethc.exe trick still works! Here's how it goes.

Step 1. Restart Windows and hard reset (long press the power button) as the Windows icon appears on the screen. Windows should now start in repair mode.


Step 2. Take advantage of the repair mode and wait for it to attempt the repair (this takes several minutes). Once done, click view report details and click on the link down below that ends in a .txt. This will open the report in text editor.


Step 3. Use the open feature of text editor to navigate to Windows/system32 directory and rename sethc to something random. Now make a copy of cmd.exe and rename this copy to sethc.


We have now renamed a copy of command prompt and associated it with the sticky keys functionality.

Step 4. We boot into Windows again and arrive at the login screen. At this point, we press sticky keys 5 times to active the sticky keys functionality, which will now fire up the command prompt.

Step 5. We now take advantage of the command prompt to execute the following commands to reset the password
net user
net user <USERNAME> *


We have now successfully changed the password and can now use this password to login.

Tuesday, March 6, 2018

How to Install Windows 7 or 10 on Mac

Written by Pranshu Bajpai |  | LinkedIn

I like dual booting my systems since I switch between Windows, Mac OS X and Linux fairly regularly. On a PC, I would usually dual boot Windows and Linux, and on a Mac, I usually dual boot Mac OS X and Windows. Installing Windows on a Mac may or may or may not go smooth depending on how old the Mac is. I've installed Windows 7 on a 2011 iMac without a problem so this procedure should work at least as far back as 2011 Macs in my personal experience. But the process itself can get convoluted and there are some pitfalls to be avoided so I decided to document it here.

Bootcamp: To Use or Not to Use?


Definitely use Bootcamp. Bootcamp is Apple's native utility for installing Windows on a Mac. Installing Windows and the relevant boot configuring without Bootcamp can be a painful and unnecessarily long process and using Bootcamp is recommended. For example, when I tried to boot my Macbook Pro off of a USB drive containing Windows installation, it got to the installation screen but then would not let me install Windows on the disk as shown below. Note that the disk was MS-FAT. It did not install even when I deleted the partition so I had plenty of unallocated space. I could not even format the unallocated space into NTFS.


I tried to fix this from command line but it was a lot of hassle and should be avoided:


Meanwhile, I messed up the original Mac OS X installation while trying to install Windows and had to reformat the entire drive and reinstall the Mac OS:


 I had to reformat the hard drive because without the reformatting, it would not even show up as an option during Mac installation.


 So I had to format the drive as shown before so I could reinstall the Mac OS X.

All this to show that installing Windows on a Mac without Bootcamp is an unnecessarily cumbersome activity that should be avoided. 

Using Bootcamp


Apple did a great job of documenting the procedure here. Follow Apple's instructions there to use Bootcamp. Note that you should have a Windows ISO and a USB drive ready.


Make sure you also download the correct version of drivers needed for your particular Mac. My 2012 Macbook Pro needed version 5.1.5621. If you are installing Windows 7 like me, quit at the screen shown below to manually download the archive containing the right drivers.


Unzip the archive and place it at the root location of your thumb drive.


Next, open Bootcamp again and this time check the 'install Windows 7 or later version'.

It now asks you to resize your partition to make room for Windows. 

It is here that I encountered a strange error: "Your disk could not be partitioned. An error occurred while partitioning the disk. Please run Disk Utility to check and fix the error."


So of course I followed the advise and ran Disk Utility 'First Aid' on my drive to see if it is failing. Everything seemed OK. I thought maybe I will have better luck fixing drive errors if it wasn't mounted so I rebooted into Single User mode (Command+S) and ran '/sbin/fsck -fy' to fix errors:


No luck though. The same error persisted while trying to partition the drive. Long story short, it was 'File Vault' on Mac that was causing the error in partitioning. File Vault is Apple's disk encryption utility and if it is functional, it will protect the drive against manipulating by Bootcamp. So turn off File Vault. This, unfortunately, can take a bit of time as disk encryption and decryption can be slow.


After turning off File Vault, I was able to partition the drive and the system rebooted into the thumb drive to install Windows:


I had Windows running on the Mac in a short while but the Bootcamp drivers still needed to be installed. Otherwise, there is no network connectivity, no display drivers, no sound etc.

So we use the drivers we downloaded earlier into the root folder of the USB stick and let them install:


I still did not have the display right after all the drivers were installed. Turns out that Windows needed to update itself before that problem was fixed. So I updated Windows to the latest definitions and the display drivers for the resident NVIDIA GT 650M card on the 2012 Macbook Pro showed up right away under 'Device Manager'.

Thus ends the dual boot saga.

Friday, February 7, 2014

How To Recover Grub After Installing Windows | Ubuntu / Kali / Debian Linux

Written by Pranshu Bajpai |  | LinkedIn

A Little Rant


It's 2014 and Windows still assumes that it's the only OS out there.

When you install windows and then install Linux, in the grub boot menu you would find Windows properly accounted for. Grub recognized windows and creates an entry for it in the Boot Menu.

Should we assume Microsoft likes bullying (since there's no apparent technical reason for why they won't make a windows boot-loader that would recognize and make an entry for Linux in the Boot menu).

So if you have Linux and then you try to install Windows, it's nasty boot-manager would remove the linux entry and all you will see at Boot time is Windows and no entry for linux.

Kali Linux is the primary OS that I use on my laptop. I rarely ever use windows so I removed it altogether. However I was developing an App for Windows and needed to code in Windows SDK (Visual Studio) since I needed some libraries like 'wlanapi' that weren't present in Linux IDEs

Long story short, I installed Windows on top of Kali and as I expected, it removed the entry to Kali from the boot menu.

Here are a few commands that I used to solve this issue. This is by far the easiest way to bring the Linux / Ubuntu / Kali boot entry back.

How To Recover Grub (Kali Linux Boot Menu Entry) After Installing Windows 

For this you need:

1. Ubuntu (or Any linux) Live CD / USB
2. Eyes to read and Fingers to Type some commands 

Step 1. Boot from the Ubuntu / Kali / Fedora (any linux) live disk OR USB

Step 2. After the 'Live CD Desktop' loads up, Find Terminal.

Step 3. After the Terminal comes up. Type the following commands:

#sudo mount /dev/sda10 /mnt 

#Note that here for me the root ( / ) of my Kali Linux was on device '/dev/sda10'. For you this would be different and you should check this out under 'Disk Manager' in your Live CD. You are looking for the partition number of your main partition

#for i in /sys /proc /run /dev; do sudo mount --bind "$i" "/mnt$i"; done

#sudo chroot /mnt

#update-grub

#grub-install /dev/sda

#update-grub


Step 5. That's it. Exit the Terminal and reboot.

You should now see Grub restored. This is one of the ways in which you can easily and quickly restore grub after installing windows

Note that sometimes you may loose the entry to your Windows OS after these steps. But all you need to do is run these 3 commands to get it back:

#apt-get install os-prober

#os-prober

#update-grub


Update


I recently lost Linux grub again after installing Windows 7 on my laptop and this time I decided to try an ISO called 'boot-repair disk'. I had heard of this a lot and seems to be the tool of choice for people who don't want to get their hands dirty using the linux terminal.

The tool is pretty good in that it does what it is meant for, without any glitches. This is all you have to do:

1. Download 'boot-repair disk' ISO
2. Burn it to a CD or make a bootable Pendrive
3. Boot into the boot-repair disk ISO

After that, it is all automated. As soon as you boot into this live disk, it will automatically begin mounting all your file systems and looking for grub. Once it is located, it will be restored automatically and at the end a message will be displayed to you.

So if you are someone who isn't all that thrilled about typing commands on a Linux terminal in the method I discussed previously, this ISO is for you.

References:
AskUbuntu.com

Sunday, October 6, 2013

VPN Configuration / VPN Client in Windows 7 / Windows 8 / Windows xp | How to set up | Anonymous Internet | Creating VPN Secure Connection

Written by: Pranshu | Find Pranshu on Google+ And LinkedIn

In my previous post, I have mentioned the reasons for using VPN and how to install or configure it in Linux.

The process becomes even simpler in the case of Windows.

How to set up / configure VPN connection in Windows

1. Subscribe to a VPN service provider. I have subscribed to AirVPN.

2. Locate 'VPN Configuration Generator' and choose 'Windows' as Operating System.


3. Download the .opvn file and .proxyauth file (in case your local network (proxy) is using Authentication)


4. Goto OpenVPN website --> 'Community' and download 'OpenVPN Client'

5. Install OpenVPN client. Then Goto programs --> OpenVPN --> Config

This should open the 'config' folder. Paste the downloaded .opvn and .proxyauth files there.

6. Run the OpenVPN client. Right Click the 'icon' in right corner below ; choose VPN Server and 'connect'


You should now see a window where VPN is self-configuring according to the information in the .opvn file.

After it finishes, you will notice a new connection with a new IP (Notice a private IP address).


In the 'cmd' terminal, type 'ipconfig' and you should now see the new connection and its IP.


Remove any local proxy settings from the browser and connect to the Internet. You should now be connected through a VPN tunnel.